The clarinet, with all its rods and keys, can look daunting to pick up. There are lots of keys, it comes in multiple pieces, and knowing which one does what can be confusing.
There are also lots of different clarinet types, with each one being built slightly differently. But, they all have similar parts and it doesn’t have to be overwhelming once you break it down.
In this post, we’re going to break down the parts of a clarinet piece by piece and take a look at what its purpose is and why the clarinet needs it.
Related: Check out our post on the best beginner clarinet here.
Anatomy Of A Clarinet Diagram
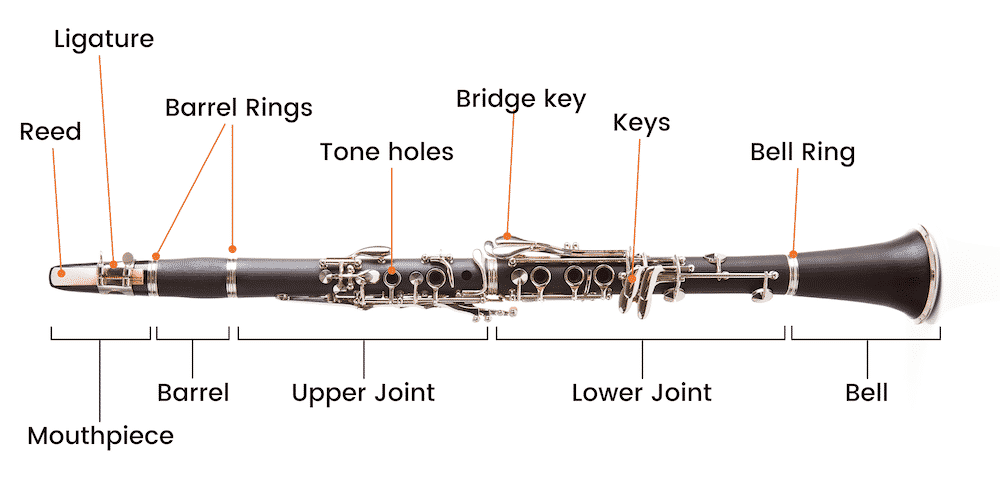
The clarinet is made up of five main parts:
- the mouthpiece
- the barrel
- the upper joint
- the lower joint
- the bell
This guide is for the most common of the different types of clarinet, which is the clarinet in Bb but a lot of the features are very similar to other types too.
The Mouthpiece
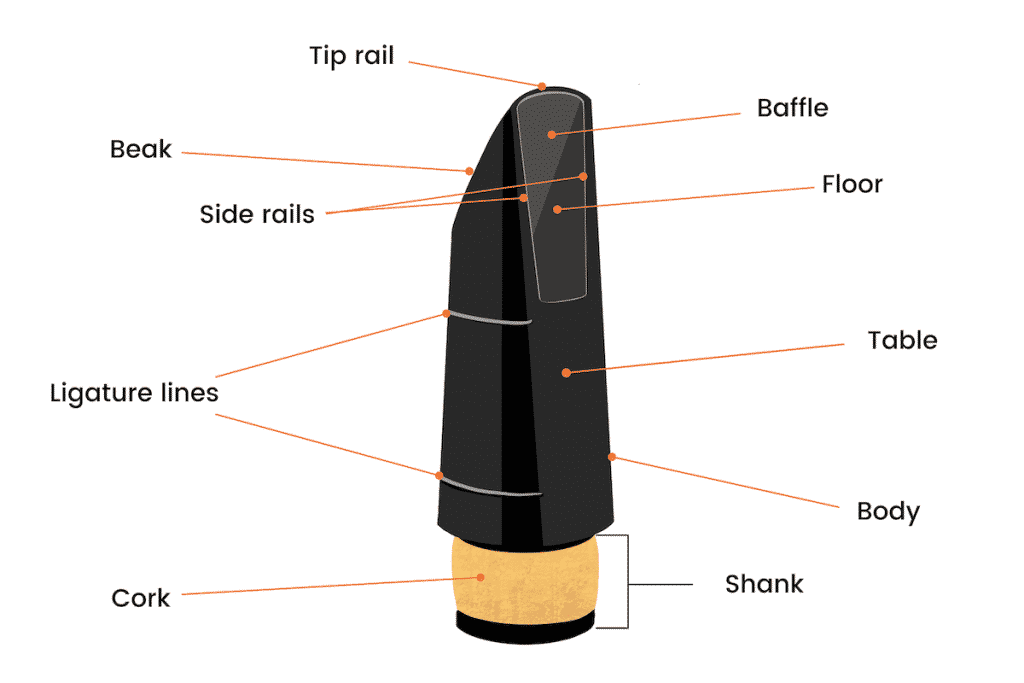
The first piece of a clarinet we’ll look at is the clarinet mouthpiece which is a small, hollow piece of hard rubber that you’ll find at the very end of the clarinet.
At the top of the mouthpiece is a long tapered opening called the mouthpiece tip, which is the part the musician blows air into.
The shape and width of the opening can vary too, which can affect the tone of the clarinet.
As they blow into it, they blow across a small piece of cane called the reed which sits on what is called the table.
The reed is held in place by the ligature, but we’ll cover that a bit later in this article.
At the other end of the mouthpiece is the tenon, which is covered in cork and seals the mouthpiece to the barrel.
A good mouthpiece should last several years but they are very fragile and you should take care not to drop it or hit it as if chipped in can affect the tone of the instrument.
Related: Read our guide to buying a clarinet mouthpiece here.
The Reed
The reed is a small, thin rectangular piece of cane that is placed on the table of the clarinet’s mouthpiece and held in place by the ligature.
The back of the reed is completely flat and smooth; this side goes against the mouthpiece, with the top side being hard and shiny.
The top side is actually the uncut part of the cane which is called the reed stock, which stops at a file marking and tapers down to a very thin tip near the mouthpiece tip.
As the musician blows into the clarinet, it causes the reed to vibrate and produces sound.
Each reed is unique, but there are standard thicknesses and different types of thickness to tailor to players and their own preferences.
Related: Read our guide to buying the best clarinet reeds here.
The Ligature
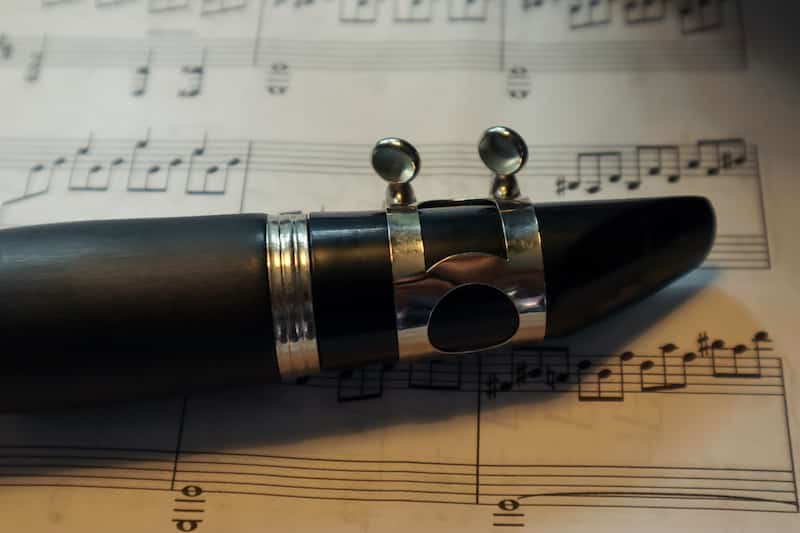
The ligature is an adjustable loop that secures the reed to the table of the mouthpiece.
It’s held in place by two screws which can be adjusted to ensure the reed is in the correct position and won’t move during play.
They tend to be made of metal, but, like the mouthpiece, there is an extremely wide variety of ligatures to choose from, and you’ll find ligatures made from plastic, leather, and string, as well as ones with gold and nickel-plated.
The materials used can also dramatically affect the tone of the clarinet, and you’ll find musicians changing their ligature depending on where they’re playing.
To put the ligature on, loosen the screws and slide the wider end of the ligature over the reed onto the mouthpiece so the tapering of the hoop matches the tapering of the mouthpiece.
The side with the screws is placed over the stock of the reed, and the screws are tightened by hand using the paddles.
Related: Our post on the best clarinet ligatures here.
The Barrel
Moving on to the next piece of the clarinet, we have the barrel which connects the mouthpiece to the upper joint.
Its job is to funnel the air through the instrument and depending on its shape and what it’s made of can have a dramatic impact on the sound the clarinet produces.
The shape of the barrel on the inside is called the taper, and it comes in a few different options:
- straight
- standard
- reverse
- double
Another key thing about the barrel is that it can affect the tuning of the clarinet by pulling it away from the upper joint.
This extends the distance that air has to travel through the clarinet and causes the notes produced to be slightly flatter in pitch.
Barrel Rings
With the barrel connecting to the mouthpiece and upper joint, the tenons can be put under a lot of pressure.
To prevent the wood from bursting under this pressure and splitting apart, there are small metal strips fitted onto each end which are called the barrel rings.
Not every clarinet will have them, and depending on what material your clarinet is made of, they may not actually be necessary and will be purely cosmetic.
If you notice that your barrel rings are loose, it can mean that the wood of the barrel is too dry and maybe brittle.
You can try playing the clarinet for a while to add some moisture but if it’s still the case, it’s important to take your clarinet to a professional to be serviced or your barrel could split in two.
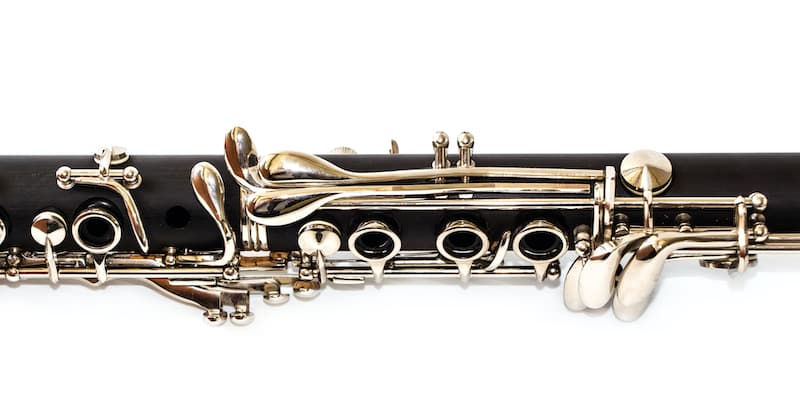
Upper Joint
Going down the clarinet, next, we have the upper joint which is the part where the left hand is placed, and you’ll find the tone holes that determine the pitches that are played.
As the musician blows air into the mouthpiece, it travels down the clarinet, and by pressing covering combinations of holes the musician can change the pitch of the sound that is produced.
As with all main pieces of the clarinet, the upper joint has corked tenons at both ends to ensure it’s securely connected to the barrel and the lower joint.
Another important thing to mention about the upper joint is that this is where you’ll usually find the brand’s logo and the serial number of the clarinet.
Tone Holes and Keys
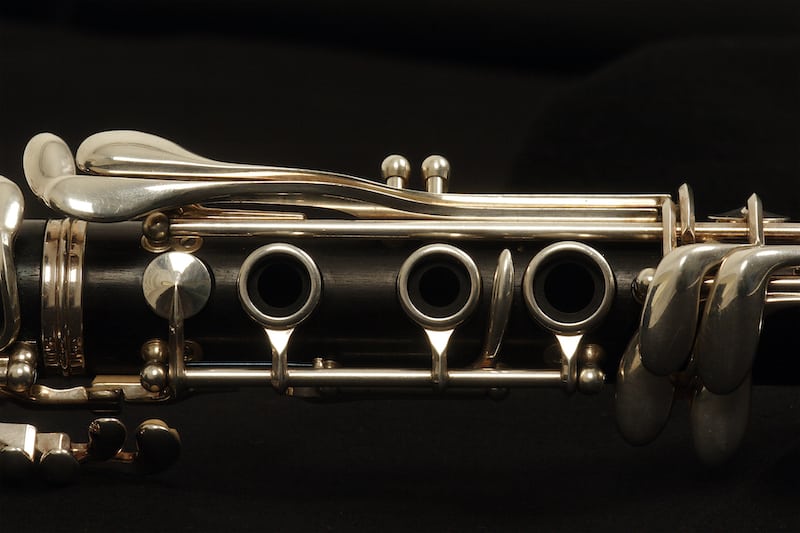
As we briefly covered, the tone holes are the holes drilled into the body of the clarinet.
These are how the clarinet can play different pitches of notes by the musician changing which tone holes are open or closed (and sealed), which changes the flow of air through the body of the instrument.
Some of the tone holes on the clarinet are sealed by covering them with the pad of a finger but others are closed with key pads which are cushioned, gut-lined metal circles attached to levers.
When pressing keys and covering tone holes, it’s important that they are completely covered, as when a tone hole isn’t sealed, air leaks out and can cause an airy tone, a squeak, produce the wrong note, or even prevent a note from sounding at all.
Despite the keys and rods being made of metal, they are quite delicate, so be careful not to damage them as loose springs or bent levers can prevent proper sealing.
Register Key
One very notable key on the clarinet to mention is the register key which is a lever found on the back of the upper joint above a tone hole and ring.
When it’s pressed (by the left thumb), it causes the pitch of the notes being played to be raised by an interval of an octave and a fifth (a perfect 12th).
For example, when the first three fingers of the left hand and the left thumb ring key are pressed, the Bb clarinet plays its written middle C.
But, when pressing the register key, it instead produces the written G above the treble clef staff.
Lower Joint
The penultimate piece of the clarinet is the lower joint which looks very similar to the upper joint, being covered in keys, rods, and tone holes.
The lower joint, however, is longer than the upper joint, has a socket on its top and a corked tenon on the bottom, and is where the player’s right-hand goes.
The bottom tenon of the upper joint slides into the top socket of the lower joint.
Bridge Key
The bridge key is a mechanical connection between the two parts that connects the key of the upper and lower joints.
When assembling the clarinet, it’s very important to have the upper and lower joints correctly aligned as, if they’re not, the bridge key won’t work, and you won’t be able to play the lower notes on the clarinet.
You’ll find the connection on the right side of the bottom of the upper joint, where there is a metal bar; it lies between the right side keys and the tenon.
Then you’ll find a small, horizontal metal plate on the right side of the top of the lower joint,
When the pieces are connected, the metal plate slides beneath the bar and forms the connection.
The Bell
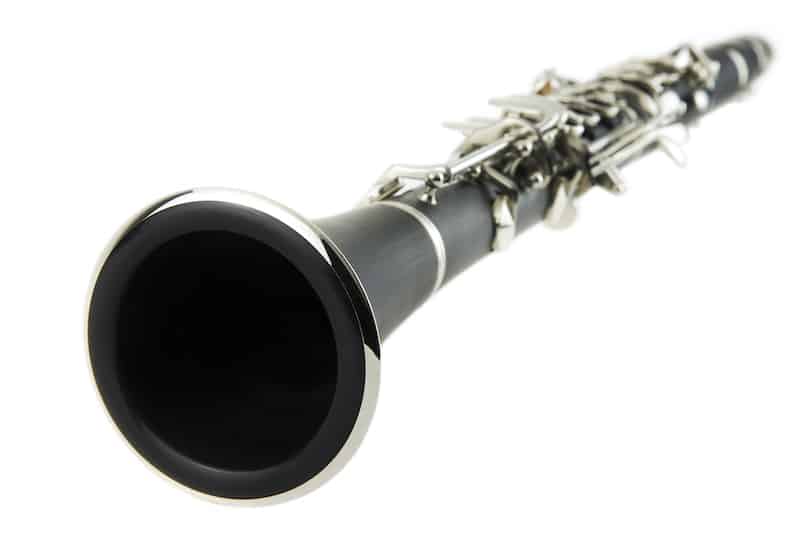
And lastly, the final part of the clarinet to know about is the bell which is the flared end of the clarinet and where the sound is projected from.
This is another part that advanced clarinetists often customize, experimenting with different brands and styles of bell to find the tone they like.
Despite looking like it’s used to amplify the sound of the instrument it’s actual purpose is to direct air and stabilize the tone for certain ranges.
Bell Ring
The bell ring is another small metal ring fitted around the top end of the bell.
It serves the same purpose as the barrel rings: to prevent the pressure of the tenon from splitting the bell apart.
Also like the barrel rings, certain materials render the bell ring unnecessary, but it’s often left on for cosmetic reasons.
Tenons
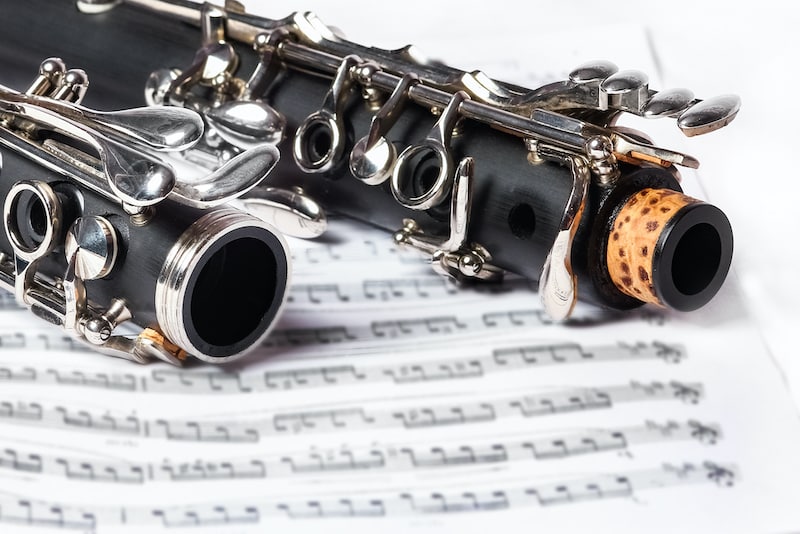
The last thing we need to discuss on the clarinet is the tenons. They’ve vitally important as to create sound, wind instruments need to be completely sealed systems.
As you hopefully know, when the player closes or opens a hole on the instrument (with a key or fingertip), the way the air travels through the instrument is changed; this is what creates different pitches.
So, if any sealed part lets air leak through, it can prevent the right note from sounding.
To keep the air inside and completely sealed, the body of the clarinet is held together with tenons which are often lined with cork.
The cork compresses and creates a strong seal that serves two purposes: first, to make sure that no air leaks out, and second, to hold the pieces together, so they don’t come apart while playing.
You will need to replace the cork as the clarinet ages as over time, they can become worn out.
The humidity that the clarinet is stored in and the number of times it is put together will make the cork shrink, and the pieces will no longer fit snugly.
To help them fit, you rub a bit of cork grease rubbed around them to help lubricate them and make fitting easier.
Summing Up Clarinet Parts
We hope that helps make sense of all the different clarinet parts you need to know about.
To a beginner, a clarinet can look very involved with a lot of moving parts, keys, and rods. But, once you’ve learned how to put it all together the instrument should play quite freely.
Just remember to take extra care to not damage the instrument as any bent keys, sticky pads, or clogged holes can prevent the clarinet from playing correctly, so clarinets must be held and stored carefully.