Playing the horn should be an enjoyable experience for all hornists. But, if it’s not been cleaned properly it can be discouraging and make you not want to pick it up. After all, a clean instrument is a happy instrument and, therefore, makes a happy musician. Learning how to maintain and clean your horn is an essential part of being a horn player because it will reflect how you play, your morale and your health.
In this post, we’re going to walk you through how to clean a french horn in our step by step guide. Let’s jump in.
What you Will Need for Cleaning

Cleaning the horn is easy and inexpensive and you’ll most likely have some of the items already lying around the house.
But, you will need a few specialist supplies for cleaning your horn which we’ve listed below:
- Two soft bath towels, soft rags and a polishing cloth
- Mouthpiece brush
- Cleaning snake brush
- Valve oil
- Slide grease
- Bathtub (or large basin)
You can buy each of these cleaning supplies separately or you can buy a french horn cleaning kit like the one below.

- SAVE MONEY by making your french horn last longer and look better
- STOP WORRYING about how dirty, smelly, and gross your horn is
- Make your horn PLAY and SOUND BETTER by keeping it clean
French Horn Cleaning Instructions
Here are the step-by-step instructions needed to clean your French Horn properly.
1. Prepare Your Space
The first step is to prepare for your french horn’s cleaning session.
Take your two bath towels and line one at the bottom of your bathtub or basin and the other one besides the bath.
They should be fairly big so as to cover the entire bottom of your bath and to be able to lay out the horn, all the slides and the mouthpiece on after you’ve bathed it.
Once you’ve lined the bath with the towel and got everything else ready it’s time to fill it with lukewarm water.
It’s important to NOT use hot water as this can damage the horn.
Be sure to have enough water in the tub to completely cover the instrument.
2. Take Your Horn Apart
Now that your bath is prepared, carefully remove all the slides of the horn and the mouthpiece if the mouthpiece is in the instrument.
The removal also includes the valve caps and bell if the horn has a detachable bell.
But, do NOT take the rotary valves apart as you should leave the disassembly of the rotary valves to an instrument technician.
3. Place Your Horn in the Bath
Carefully place your french horn, slides, valve caps and mouthpiece in the tub.
Once it’s fully submerged, press all the valves down a couple of times and leave it to soak for an hour.
In the case of stuck valves or an instrument not bathed in a very long time, you can soak up to three hours.
4. Use the Brushes
The next step is to clean your horn with all the brushes.
These brushes are tools to clean out the mouthpiece and other parts of your horn, such as the lead pipe, tuning slides and other tubing.
If there is no access to a French Horn mouthpiece brush, the use of a cotton swab will work.
Take the cleaning snake brush and clean out all the slides, other tubing and the lead pipe of your horn.
But be careful not to force the snake brush through the slides or other tubing as doing so may damage the horn.
If you’re struggling to clean you can try using a trumpet or clarinet snake brush as that may help clean out those bits.
Once you’ve cleaned the slides and tubing, it’s time to clean out the mouthpiece using the mouthpiece brush.
If you don’t have a mouthpiece brush you can also use something like a cotton swab.
5. Take Everything Out of the Water
Once it’s had a good soak and you’ve given it a clean it’s time to get it all out.
Remove the mouthpiece, slides, valve caps and horn from the bathtub and place them on a dry soft towel.
Make sure to completely empty all the water in the horn and slides by tipping them.
Depressing the valves and tipping the horn 360 degrees may help get any extra water out.
6. Dry Everything
Now that you’ve got the water out of the instrument you should dry the surface of your horn, slides, mouthpiece and valve caps with soft dry rags until it’s completely dry.
Leave them to air dry for a few hours and then tip the horn one last time to get rid of any excess water left over.
7. Use Some Valve Oil
The use of valve oil keeps the valves in good working order and helps prevent corrosion.
Once it’s completely dry you can take some valve oil and pour a little bit down the slide towards each valve one at a time.
You can also move the valves to ensure that they’re evenly coated with the oil.
Make sure to use valve oil that’s suitable for instruments with rotors.
I personally like the multi-purpose valve oils such as the ultra-refined petroleum oil Fat Cat or oils like Blue Juice or Al Cass are all good options.

- Valve, slide, and key oil
- Compact bottles that will fit in any brass case
- Used from beginners to professionals
8. Apply the Slide Grease
As with the valves, slides need a lubricant to be in good working order.
Slide greases made for brass instruments are usually the first option for many horn players.
Lanolin, often used by nursing mothers, is another low-cost option and a single tube is long-lasting or you can get one specialy made like this:
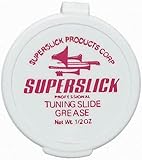
- Slide grease
- Small container easy to fit into any case
- Great for all playing abilities
With the slide grease or lanolin, lightly coat each slide and insert them into the horn one at a time by starting with the valve slides and ending with the tuning slides.
9. Oil the Rotary Valves
Oil the rotary valves and bearings with the rotary valve oil.
Then, when you’re finished applying the valve oil, screw the valve caps back on.
10. Apply Valve Oil Down the Lead Pipe
Put a few drops of valve oil down the lead pipe and turn the horn to help it get to other areas of the horn.
The oil helps prevent corrosion.
11. Blow Through the Horn
To finish, you can blow through the horn to detect any extra water or oil.
If there’s any residual water left then empty it by again tipping it 360 degrees if necessary.
Why Do You Need To Clean Your French Horn?

As with other brass instruments, French horns produce condensation on the inside of the instrument by the player’s embouchure and air stream.
Even though emptying the horn of its condensation through a spit valve and removal and inserting slides is often done and advisable upon hearing its gurgle, food particles, bacteria, fungi, mold, and other grime remain inside the instrument.
Over time, this buildup will have adverse effects on the horn and your health.
Adverse effects from not having a horn cleaned regularly include:
A Less Desirable Sound
The buildup of bacteria, mold, food particles and other grime hampers the airflow required for a full sound and tone from your horn.
This air resistance also affects the intonation of the instrument.
The Valves and Slides Become Less Responsive
Not properly cleaning your french horn’s valves can lead them to become sluggish due to the building up of old oil and other particles over time while slides become more challenging to move.
The Horn Becomes Tarnished
As a product of a chemical reaction between a metal, in this case, the French Horn and a non-metal compound, the player’s breath and condensation collected, tarnish is a thin layer of corrosion that develops over time without proper care of the instrument.
This metal sulfide reaction results in a darkening or sometimes even green effect on the horn’s outer surface.
The Instrument Becomes Unplayable
The buildup of grime and the corrosion that results in lack of care will make the horn unplayable over time, therefore, shortening its life span.
Adverse Health Conditions
Musicians who do not clean their horns regularly have a greater chance of developing severe respiratory diseases such as pneumonia, flu, and in the possible case of some shared or school instruments, COVID-19.
All the adverse effects of an unclean horn are easily avoidable by regular cleanings.
How Often Should You Clean A French Horn?

Next to practicing and learning music, cleaning and maintaining your horn is an essential part of being a musician.
Here is a recommended horn cleaning and maintenance schedule:
Daily:
Oil valves and empty condensation if needed, wipe outside of horn with polishing cloth after playing to get rid of fingerprints.
Weekly:
Clean the mouthpiece with a mouthpiece brush separately from the instrument.
Lubricate the slides if needed.
Monthly:
Give the horn a full bath using the instructions in this article.
Check the valve strings and valve bumpers to see if they need replacing.
Replace valve strings and bumpers when required.
Yearly:
Take the horn to an instrument repair person for a professional chemical cleaning, restringing, and other minor repairs needed.
The Dos and Don’ts of French Horn Maintenance and Care:
A clean and well cared for instrument gives a horn player many years of enjoyment.
Here’s a quick recap of a few dos and don’ts of French horn care and maintenance to ensure those happy years:
Do:
- Have a daily, weekly, monthly and yearly schedule for maintenance and care; stick to it
- If eating or drinking anything other than water before playing, be sure to brush and floss your teeth after eating
- Drinking water is appropriate when playing the horn
- When emptying the horn in a valve slide, be sure to depress the lever while removing the slide
- While placing the mouthpiece in the horn, gently place it into the lead pipe and give it a gentle twist
- Place your horn in a safe spot, such as an appropriate French Horn stand or case when not played
- Empty the horn after playing before putting it away
- Be sure you have a sturdy horn case and that it’s always fastened when closed
- If sick with flu or other respiratory ailments, give the horn a full bath soon after recovery
- If flying, have the horn as carry-on luggage or in a particular handling area (some airplanes have a special compartment for strollers and other items)
Don’t:
- Don’t eat or chew gum while playing or not brush and floss your teeth after eating before playing
- Don’t hold the horn by the lead pipe or holding it so that it dangles (doing so increases the chances of accidentally damaging your instrument)
- Don’t store anything loose inside your horn case or on top of the instrument.
- Don’t use bar soap, pumice, abrasive type soaps when cleaning the French Horn.
- Don’t use hot water or ice-cold water while bathing your horn.
- Don’t let other people, particularly untrained people, play your instrument.
- Don’t Wait too long or avoid cleaning your horn.
Summing Up Cleaning French Horns
We hope that helps make sense of how to maintain and clean your horn.
Remember, a clean and well-maintained horn is key to good, stress-free performances, rehearsals and practices.
It also adds to your enjoyment while keeping you healthy.
A clean horn is a happy horn and, therefore, makes a happy and healthy hornist.