If you’re learning the flute, then this article is a must read. There are so many different parts to clean and it’s easy to miss something. I know because I’ve been playing for years and still struggle with cleaning my own flutes.
Most wind instruments contain numerous nooks and crannies where dust, mold and bacteria could be found lurking and the flute is no exception. Cleaning your instrument is essential, not only to maintain its appearance and potentially its re-sale value, but also for your own health and well-being.
This guide will show you how to clean every part of your flute from top to bottom including all those hard-to-reach places that never get cleaned properly! You won’t have any more problems with sticky pads or keys being sluggish anymore after following these simple steps.
When to Clean Your Flute
Most flutes cost a lot of money, so they need, and deserve, a considerable amount of attention.
Whether it be new or re-conditioned, a flute that has recently been professionally cleaned is a thing of beauty and you will want it to remain so for as long as possible.
In short, your flute should be cleaned every time it is used, just as you wash your clothes after wearing them and clean your teeth after eating.
Our mouths harbour significant numbers of bacteria, not to mention fragments of food and drink and traces of mucus, saliva and even blood, and all of these could end up inside your flute after a playing session.
If this sounds somewhat disgusting, please be reassured, there is little or no evidence of anyone ever getting ill as a result of playing a flute, however it makes sense to keep the instrument clean and to avoid sharing it whenever possible.
Cleaning your flute thoroughly, both inside and out, will not only reduce the potential risks to those who play it, but will also keep the instrument in good condition, maximising its re-sale value when you decide to upgrade to that gold or platinum model!
Before playing your new flute for the first time, it is important to ensure that you have everything you need to clean it properly.
You also need to allow time at the end of each practice session for this vital task, and make sure younger players appreciate the importance of this too.
What You Will Need to Clean Your Flute
The equipment needed to clean your flute is relatively basic, but you need to make sure you have everything to hand before playing your instrument for the first time.
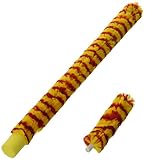
- A cleaning rod – This is usually supplied with the flute and will normally be wooden or plastic
- A gauze cloth – This is to be threaded through the slit in the cleaning rod and goes inside the flute
- A polishing cloth: Again, this can be purchased from a specialist music shop but could be substituted by a clean household duster
- The best cleaning cloths are made of soft, microfibre material that traps dirt and removes smudges and fingerprints.
- Both cloths should be washable so that they can be used repeatedly.
If you don’t have any of the above items you can purchase flute cleaning kits that have everything you need and are very inexpensive.

- Complete Flute Maintenance Kit: Includes hanky swab, coil swab, cork grease, polishing cloth, and key brush
- Effective and High-Quality: Works well in cleaning and maintaining your flute and is made of high-quality materials
- Affordable: Priced fairly and more affordable than the ones sold by local music stores
Cleaning Your Flute Instructions
The following guide is divided into three sections: cleaning the inside of the flute; polishing the flute and cleaning the tenons.
Cleaning the inside of your flute is especially important as condensation will occur inside the flute after only a short time of playing.
If you leave your flute wet inside the metal could rust and the pads could become waterlogged, affecting their ability to close tightly over the holes.
If left for a long time it can also cause a deterioration in the sound quality and efficacy of the instrument.
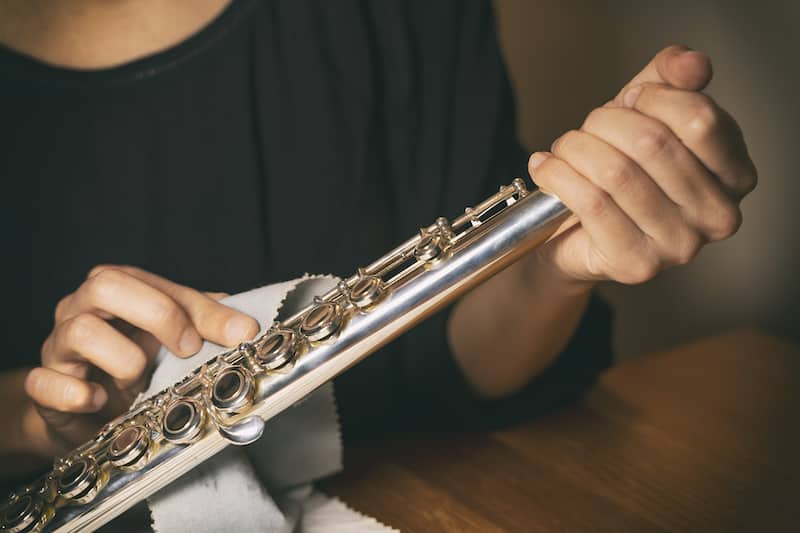
Step 1: Disassemble the Flute
Carefully disassemble the flute, separating the three main sections (head joint, body and foot joint) and laying them carefully down on a table or flat surface, taking care to avoid pressure on the keys.
For more information about how to assemble and disassemble a flute see our guide here.
Step 2: Thread your Cleaning Rod
Take out your cleaning rod and carefully thread the gauze cloth or piece of material through as if you were threading a needle.
Wrap the cloth around the top of the rod so that it is completely covered.
Step 3: Clean the Foot Joint
Carefully pick up the foot joint (it is best to start with what is usually the ‘cleanest and driest’ piece first to avoid getting the cloth too wet at the start of the cleaning process) and hold it so that the keys are uppermost.
Gently pass the cleaning rod through the foot joint, rotating it as you do so.
The rod can be passed through the tube as many times as needed until you are confident that this section is completely dry.
As soon as you have finished ensure that the foot joint is put down in a safe place before moving onto the next section.
Step 4: Clean the Body
Repeat the process of passing the cleaning rod through for the body of the flute.
There are many more keys in this section so do move the rod up and down carefully and avoid getting it caught in any of the keys.
Step 5: Cleaning the Head joint
Finally, hold the head joint so that the lip plate and embouchure hole are facing you.
The tuning cork at the top end of the head joint is delicate and needs to be precisely placed so you must be very careful not to disrupt this while cleaning.
Carefully, push the cleaning rod into the head joint, rotate and, when you see it passing the embouchure hole, slow down and stop the moment you feel it has reached the tuning cork.
Carefully, withdraw the rod and repeat as needed.
You can also carefully wipe around the embouchure hole from the outside, taking care not to disrupt the tuning cork.
Step 6: Cleaning the Outside of the Flute
Your flute should now be clean and dry inside, so you need to turn your attention to the outside.
Using the polishing cloth, carefully rub down the three pieces of the flute, one at a time.
Use long sweeps rather than small rubbing motions as these will create a more consistent shine and work until you have removed all of the fingerprints and other marks.
Take care not to rub the cloth into the key mechanism as it could become caught in a spring and cause damage.
As well as removing the fingerprints, dust and dirt which will inevitably accumulate during playing, polishing the flute in this way will also reduce the risk of tarnishing and erosion.
Step 7: Cleaning the Tenons
Once you have wiped the pieces down, there is one final task to complete before putting the flute ‘to bed’ in the case.
Gently wipe the tenons at the end of each piece (see diagram).
These are where the flute joins together and grease and dirt can easily accumulate there, sometimes causing difficulty in assembling or dissembling the flute.
A quick wipe will suffice and then the cleaning process is complete.
Once clean, it is really important to ensure that you place the pieces in the case correctly and the right way round so that they will be protected until you next wish to play.
Some players like to use a device called a ‘pad saver’ which remains inside the flute soaking up any moisture which accumulates while the flute is not being used.
- The HW Pad-Saver may be stored inside or outside the instrument
- Just the right size to reach the length of the body
- Works with all C flutes
If this is used, it must only be inserted once the cleaning process described above has been completed.
What Not to Do When Cleaning Your Flute
Do NOT be tempted to give your flute a bath.
Flutes really do NOT like water.
The pads will become water-logged and will deteriorate much more quickly, requiring them to be replaced.
Do NOT use silver cleaners or disinfectants on your instrument, these are not necessary and could cause damage to the pads and even cause the metal to rust.
Do NOT be tempted to put grease on the tenons.
If you clean them regularly as described above you should not have any difficulty in assembling or disassembling your flute.
If you do encounter a problem, it will need to be solved by a qualified flute repairer.
Summing up the Flute Cleaning Process
While this is a detailed guide, the key to keeping your flute clean and in a good state of repair is to create a regular and manageable routine.
If you clean it inside and out every day you will soon realise that it does not take as long as you think and you will reap the rewards of maintaining the value and appearance of your flute and minimising your maintenance bills.
You will also have an instrument which smells clean and is pleasant to play – a win all round!