Rosin is an important tool for every violinist and string play to have. Rosin is applied to the horsehair of a violin bow so that the hair can make enough contact with the violin’s strings to produce notes.
Whether you play the violin, the viola, the cello, or the double bass, the process of applying rosin to your bow will be the same. There are a few steps that you will need to follow in order to achieve the best results when you apply rosin to your violin bow.
Choosing Rosin
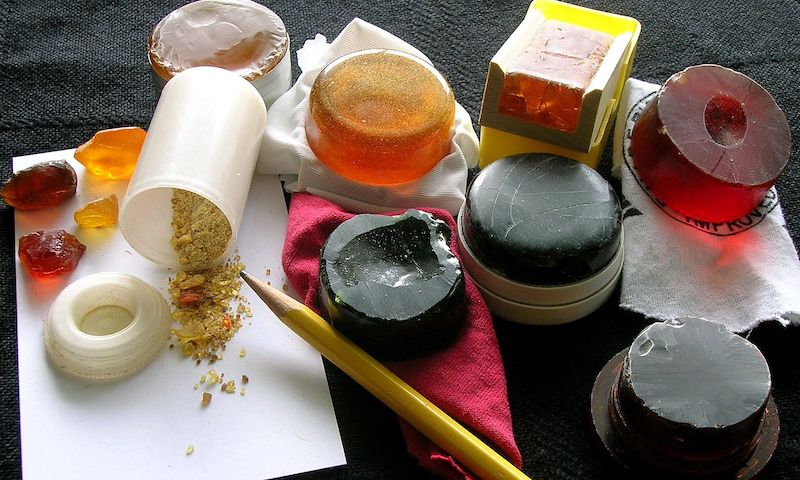
Violin rosin is produced by a variety of brands in many variations.
To achieve different results, manufacturers sometimes add extra elements and additives into their rosin mixtures, such as gold or copper.
The two main types are light rosin and dark rosin.
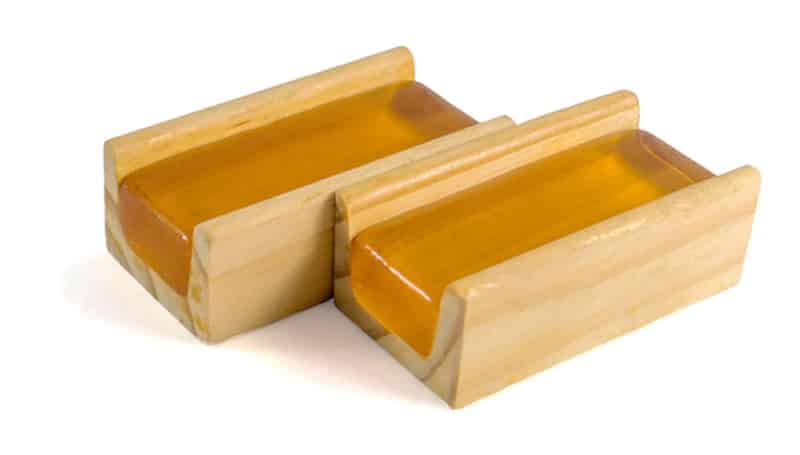
Light Rosin
Light rosin is typically harder in its composition than dark rosin and also tends to be less sticky than dark rosin as well.
Light rosin is an excellent choice for violinists who want to produce lighter and brighter sounds with their violins.
Additionally, light rosin is also a great choice for violinists who routinely play in warmer climates, as light rosin is less likely to melt or break down under hotter temperatures than dark rosin.
Dark Rosin
Dark rosin is usually softer than light rosin.
In fact, this is the rosin type that you will commonly see double bass players using to draw out the sounds from their instruments’ thicker strings.
The soft composition of dark rosin allows it to be stickier than lighter rosins, ultimately allowing a violin bow to adhere to a violin’s strings better.
Dark rosin will be a great option for you if you want to produce a heavier sound with your violin and tend to play with lighter bow pressure.
If you play in areas with warmer climates and prefer to play with dark rosin, then you will need to keep your dark rosin stored in a cool environment to prevent it from falling apart or melting.
However, you will not need to worry as much about this if you play in areas with colder climates or use lighter rosins when you play in warmer areas.
Your violin rosin should always be stored in a cool area to preserve its condition and promote its longevity.
For more information on choosing check out our post on the best violin rosin here.
Preparing Your Rosin
Preparing your violin rosin is a step that you will only need to complete when you open a brand new package of rosin.
Once you properly prepare your violin rosin, the rosin will be readily available for its usage any time you need it.
To prepare your violin rosin, open its packaging and expose the smooth surface of the new rosin.
Once the smooth surface is exposed, you will need to take a sharp object and scrape the surface of the rosin so that the smooth layer is removed and a new layer of rosin is exposed.
Something like a pen with its lid on should work well and just scrape it until it’s rough.
The new layer of rosin that you expose will be lighter in its color than the smooth original layer of the rosin.
Do not be alarmed that the violin rosin will no longer have its nice and smooth finish after you scrape its surface.
The new layer that you expose will provide the sticky rosin residue that your violin bow’s bow hair needs.
However, be careful not to scrape the surface of the rosin too hard so that you don’t crack your brand-new rosin into smaller pieces.
Tightening Your Violin Bow
Before you apply rosin to a violin’s bow, you will need to tighten the bow to an optimal amount.
To tighten a violin bow, you turn the screw that is at the end of its frog side in a clockwise direction.
Tightening a violin bow adds tension to its horsehair and the entire bow.
A violin bow that is tightened properly should be tight enough to prevent the wood of the bow from touching the bow’s horsehair while a violinist plays, but should not be tight enough to make the bow lose its natural arc.
A violin bow should always maintain its U-shaped arc when it is tightened and untightened.
Experiment with different tensions to determine which tightness works for your playing style.
Some players choose to play with violin bows that err on the tighter side, which helps to bounce the bow off of the violin’s strings better, while other violinists like to play with looser bows.
The tightness that you use for your violin bow comes down to your personal preference.
Applying the Rosin
Once you have prepared your violin rosin and tightened your violin’s bow, you will need to apply the rosin to the outside surface of the bow’s horsehair.
To apply rosin to the bow, run the violin rosin across the bow’s horsehair from the frog of the bow to the tip of the bow and back to the bow’s frog.
Repeat this process until your violin’s bow has enough rosin on it.
If your violin bow has never had rosin applied to it, then you will need to spend more time applying rosin to it for the first time so that it can have an adequate amount of rosin for all of its hairs.
However, you will only need to apply a little bit of rosin to the bow every time you need it after the bow has had rosin applied to it for its first time.
How Much Rosin Should You Use?

The amount of rosin that you use for your violin’s bow depends on how much rosin the bow already has on it, the type of rosin that you use, and the amount of rosin that it takes to produce the sound that you are comfortable with.
You do not need to use too much rosin, however, as the excess rosin will create a mess and will also produce a lot of dust as you play your violin.
As you are learning how to apply rosin to your violin’s bow and are becoming more comfortable with playing the violin, you can apply as much violin rosin as it takes for your bow to produce a sound from your violin’s strings.
You can then add more rosin to the bow as it is needed.
This will allow you to find the optimal amount of violin rosin for your needs.
How Often Should Rosin be Applied?
The amount of times that you apply rosin to your violin’s bow depends on how much you play and the length of time that you play for.
It is commonly recommended that violinists apply rosin to their bows between every four to six hours of playing time.
However, it is also a common practice among violinists to apply rosin to their violin bows before every playing session.
Cleaning Rosin Dust
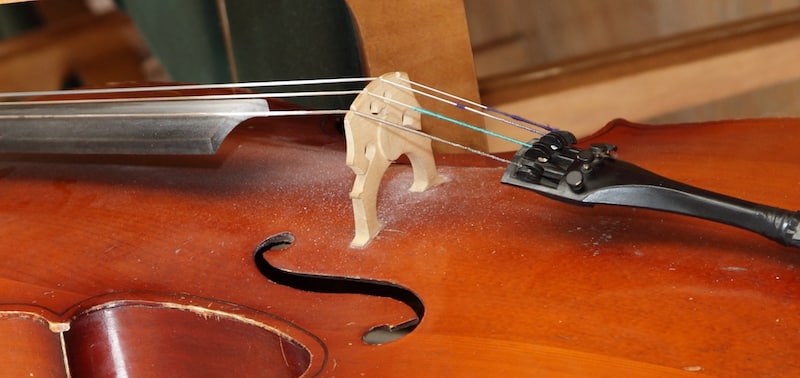
One last thing to mention is that rosin can get quite messy.
If you look at the image above of a cello, you can see the rosin dust that is left behind after use.
It’s important you clean your violin regularly to avoid the build-up of rosin damaging your instrument.
Check out our guide on how to clean a violin here where we cover what to do to get rid of rosin dust.
Conclusion
Using rosin on your violin bow will allow you to produce great sounds with your violin.
As you begin to learn more about your instrument, begin to develop your techniques, and develop an idea of what type of sound you would like to create, you can also experiment with different types of violin rosin.
You do not have to use a single type of rosin on your violin bow and can freely switch between the rosins that you use on your bow.
Different rosins will help you to create different sounds with your violin.