Playing the violin requires good posture, correct body alignment and relaxed muscles. So much of the body is involved in bringing this instrument to life; the chin and shoulders support the violin while the right hand sweeps across the strings with the bow. Meanwhile the left hand lifts the instrument high, voicing those rich, warm notes with the fingers. Good posture should be supported by a straight back and relaxed shoulders, to prevent injury and to optimise sound production.
In this post we will demonstrate how to hold a violin a step at a time and provide hints and tips for ensuring good posture and healthy habits.
Why it’s Important to Hold Your Violin Properly

Holding a violin in the correct way is important for a number of reasons.
One reasonIncorrect posture such as a hunched back or shoulders, a collapsed wrist or twisted torso (to name just a couple of examples) may lead to strain and injury.
Violin playing relies on many moving parts of your upper body which means that if one muscle is strained this may have a domino effect.
Good posture needs precision and patience but it is not rocket science, and if you practice correct form consistently it will soon become natural and familiar.
Remember that each violinist is unique with their own set of body proportions and varying levels of flexibility.
This may make the experience of holding a violin correctly differ from person to person.
For example, someone with larger hands will have a more extended reach on the fingerboard than someone with smaller hands.
This does not exclude players with smaller hands and simply means they will shift to a different position rather than over stretching their hand.
If something about violin posture doesn’t come naturally to you there are always adjustments you can make without compromising correct form.
The golden rule is that you don’t force your body into any position that is not comfortable when playing the violin, as this may accumulate tension and eventually lead to injury.
Now let’s go through the steps to holding the violin correctly.
Holding A Violin Instructions
Step 1: Picking up the Violin
The first thing to do is to take the violin out of its case by scooping your left hand underneath the top of the neck and lifting gently up.
Let’s find the starting position we need before lifting the violin to our chin.
With your left palm facing up, rest the violin’s neck just below your first finger
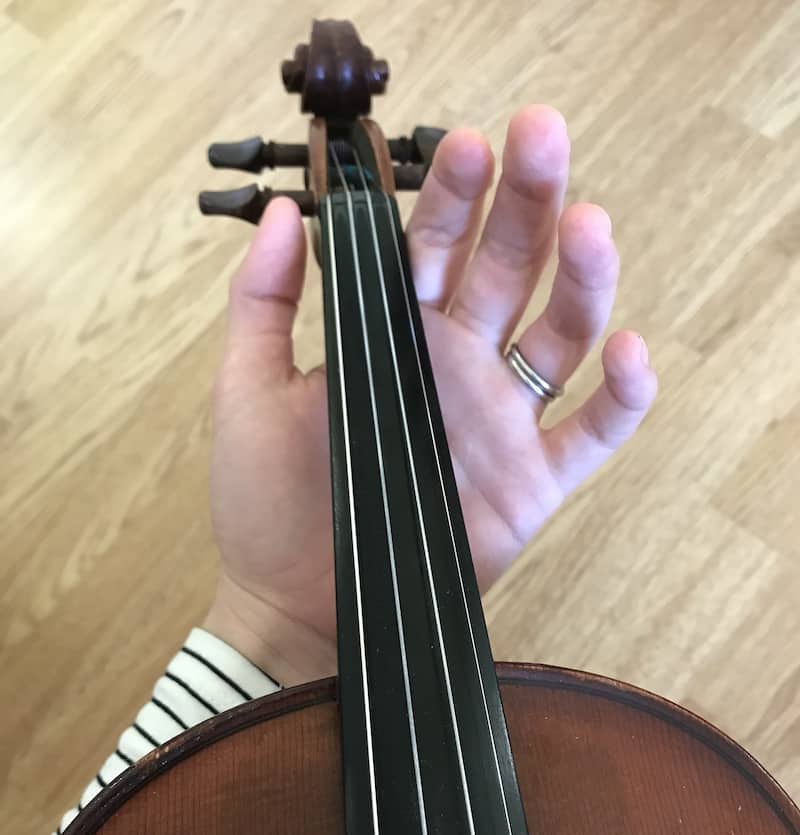
Once you’re in this position, curl your fingers and hover them over the strings while resting your thumb on the outer-right-hand-side of the neck, just below the pegs as shown in the image below.
You should be using your thumb and the crook of your first finger to loosely hold the violin in place as shown below..
This is where our thumb and fingers will be when we lift the violin to our chin, so keep them in this starting position.
Top Tip: Keep your fingernails short and clean because this will help you contact the strings correctly when you come to play and help to keep your strings clean.
Step 2: Lift the Violin to the Shoulder
Now, we are going to lift the violin to our left shoulder.
Try to keep your left hand in the starting position covered above as much as you can, and lift the violin so that it is resting on your collar bone as shown below.

Don’t move your chin just yet; first, get used to the violin resting on your collar bone.
The key is not to be doing any work with your shoulder muscles, the violin is simply resting here and so your muscles should not be tense.
One exercise you can do to make sure you are not hunching your shoulders is to lift them up to your ears and then back down to neutral.
Another point to raise is that a lot of violinists will use a shoulder rest device that acts as a cushion for your collarbone and clips underneath your violin.
You can adjust the height of the shoulder rest to suit your proportions It will be clear when it’s in the right place as it will feel most comfortable.

- THE PERFECT FIT: The Fiddlerman Violin Shoulder Rest includes height adjustable feet for a custom fit. The feet are also collapsible for easy storage...
- WORKS FOR VIOLINS AND VIOLAS: Designed to fit 4/4 and 3/4 Violins but can also fits 13" and 14" Violas.
- BEAUTIFULLY CRAFTED: The solid wood body of the shoulder rest is specifically crafted for a warm resonance and is built to last through years of...
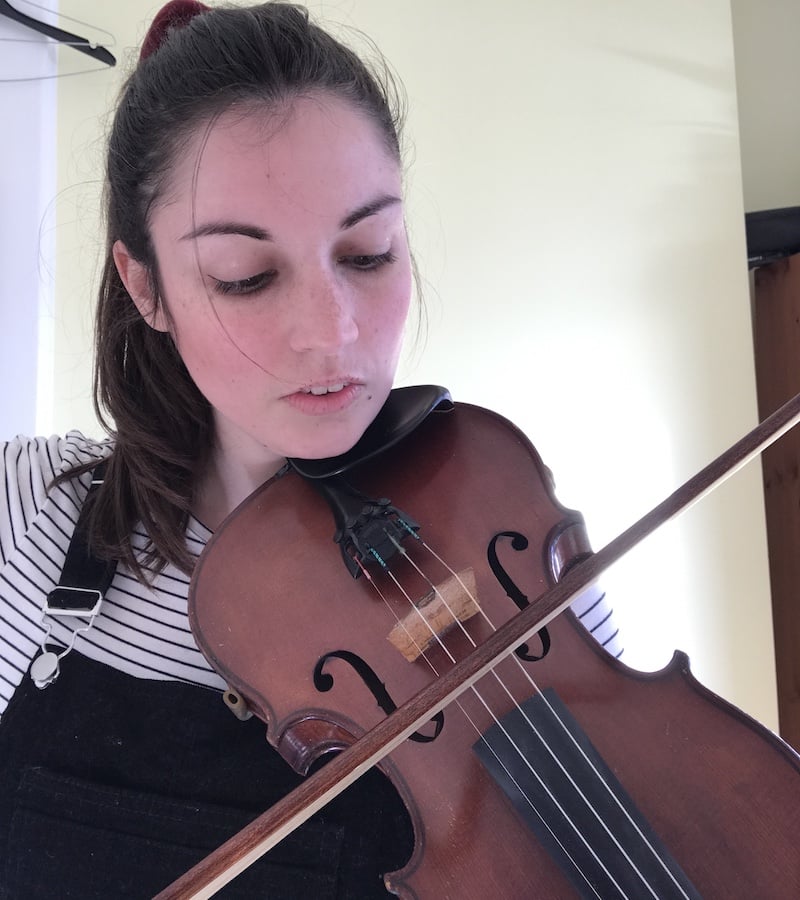
Step 3: Rest Your Chin on the Violin
Once you are sure your shoulders are in a neutral position you can rest your jawline and chin onto the violin’s chin rest.
Find a position that is comfortable, but make sure it’s the left side of your face on the chin rest and that the violin is at an angle as shown below.

Similarly to our shoulders, it’s important to not grip the violin with your jaw or neck muscles.
If you tense your jaw it will make it very difficult to swallow and you’ll end up being very thirsty.
Step 4: Check your Left Hand Position
Now that you have the violin correctly under your chin, it’s time to go back to check that you have the positioning right before moving on.
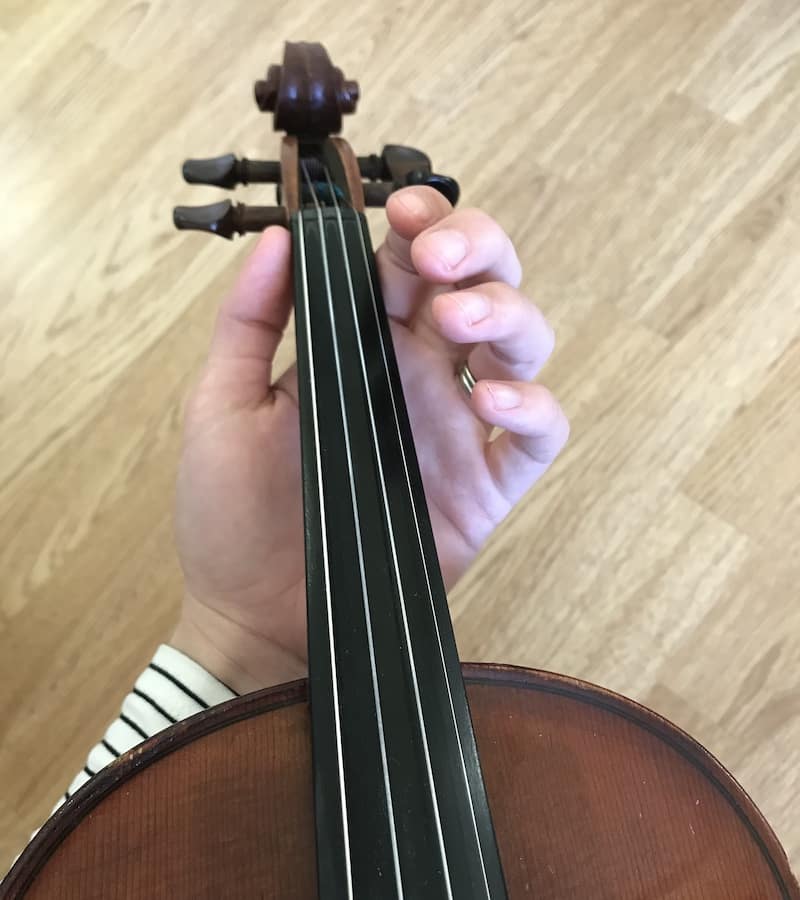
The violin should be resting in the same starting position we covered earlier, just below your first finger and then anchored by your thumb on the left side edge.
Think of this hand position as the violin’s pillow, where it rests its neck.
To check that you’ve got it right, experiment with pressing your fingers down on the strings as it will help your hand naturally find the right angle.
Your thumb should stay where it is as it’s only your fingers which press down on the strings.
Step 5. Left Wrist and Forearm Positioning
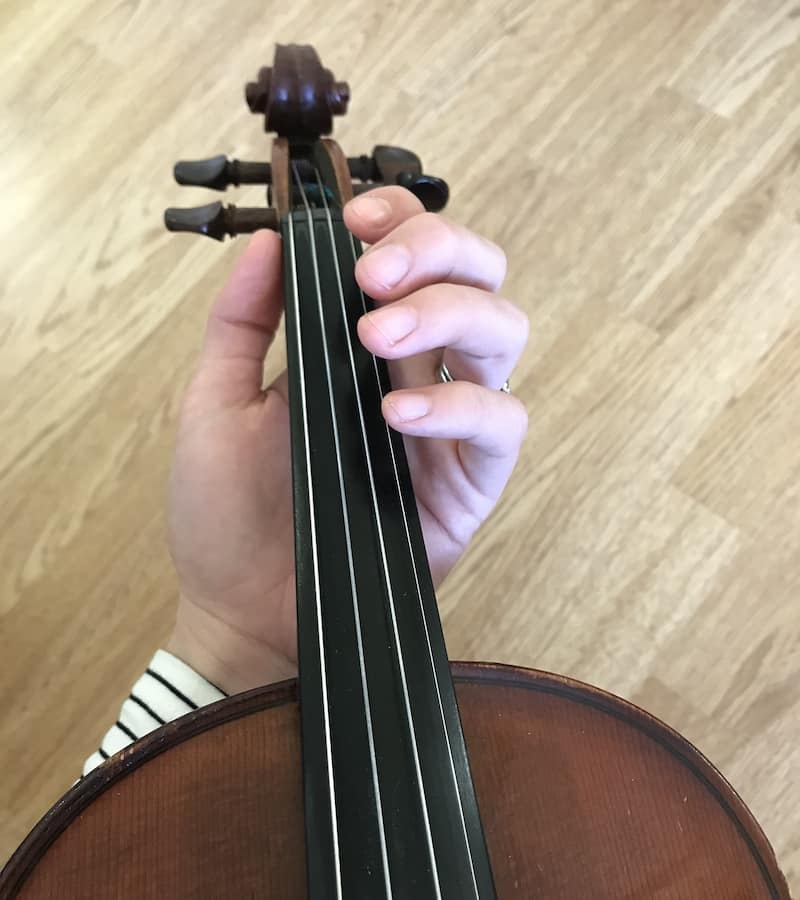
Now we need to look at your left wrist and forearm, which should be completely straight.
You’ll probably find that your wrist naturally wants to collapse under the violin, but we need it to be straight and relaxed to be able to play.
Having it straight in this way enables maximum mobility for when we move up and down the strings and stretch and flex those fingers.

Top Tip: Check your form in a mirror to see if your wrist and hand are straight.
You should be able to draw a straight line from your hand to your elbow.
Step 6: Final Form Check
Now do a little body check; relax your shoulders, jaw, right hand, wrist, and arm.
Try not to twist your body at all and remain facing forward with your back straight.
Your back will be straight if you are holding the violin upright, so don’t let the violin point towards the ground because then you will naturally start to hunch over.
Think of the violin like an additional body part you have acquired and that will prevent you from stooping, gripping too tight or tensing anything when you are holding it.
Once you are ready you can go and get your violin bow!
How To Hold A Violin Bow
Before we finish we’ll quickly look at how to correctly hold your violin bow.
If you haven’t already, tighten the bow hair with the screw at the end of the bow until it is not sagging anymore and the hairs form a straight line.
The bow hair should still have some give in it and not be too taut. Add some violin rosin to the bow hair, which will help your bow glide over the strings with greater ease.
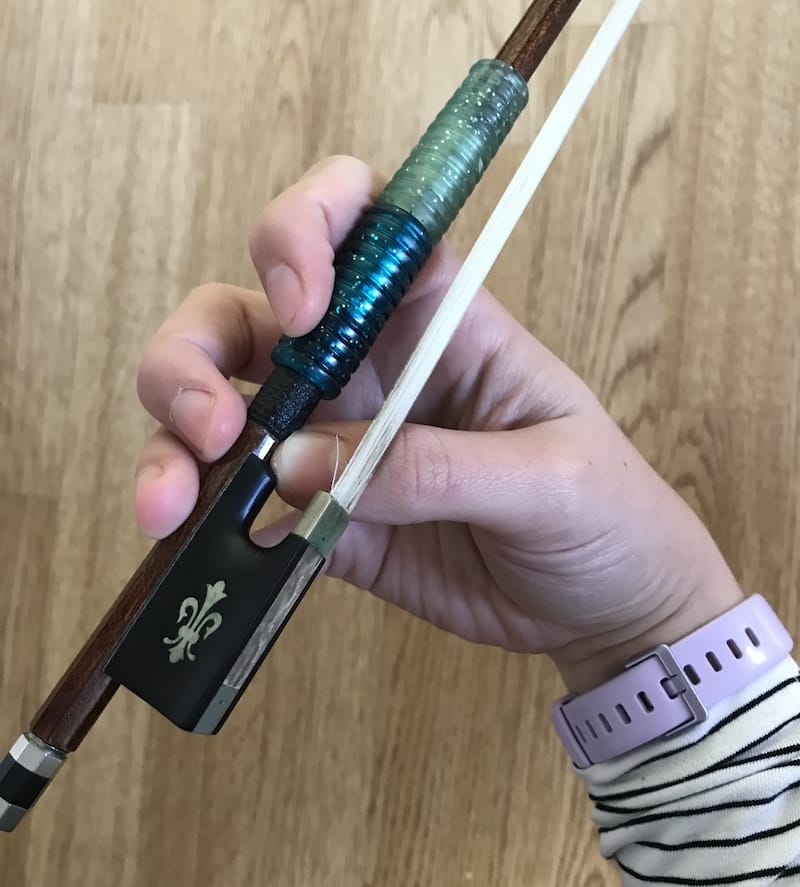
Start by giving your right hand a little shake to relax it and then pick up your bow being mindful to keep it loose and floppy.
Your thumb should be on the side of the bow facing you, while your other fingers will loosely rest on the other side (See image 9 & 10).
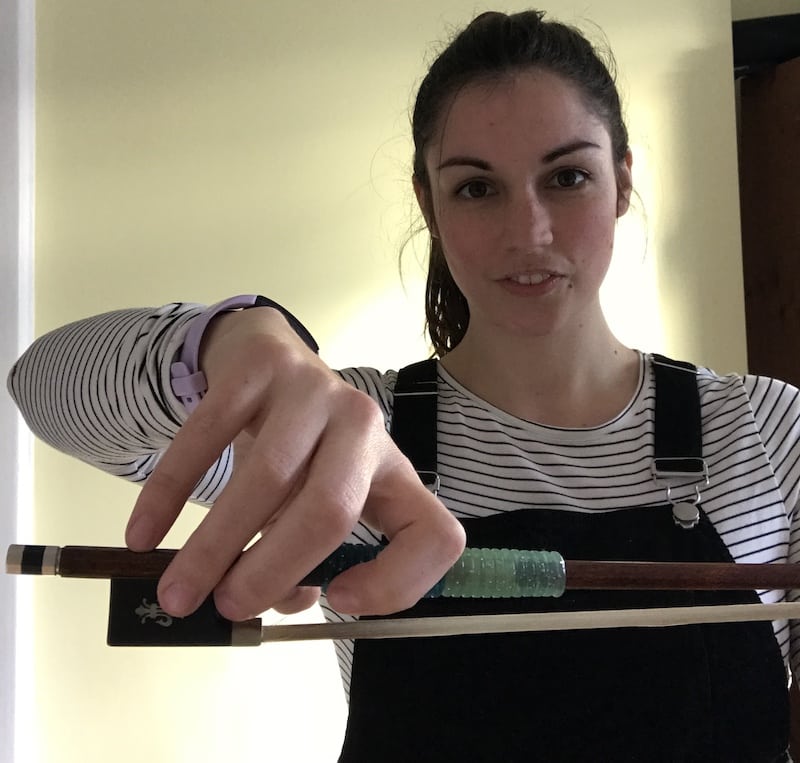
Your thumb and third finger should be close, but not touching, and your fingers should be spaced in a way that feels natural and comfortable.
It is important not to grip too much because drawing the bow across the strings requires fluidity in the right hand.
Curl your fingers over your bow while your thumbs supports from the other side.
Now you can try using the bow on the strings.
Pick the string you want to play and set the bow flat upon it, exactly in between the bridge and fingerboard.
The trick is to keep the bow hair flat and in this middle position as you draw it across the strings.
Don’t worry if you make a scratchy sound at first, that’s perfectly normal while you are getting used to this motion.
Keep checking that you are not gripping anything too hard, the violin or the bow.
Summing up the Correct Violin Hold
That’s it for our article on how to correctly hold a violin, we hope it helped make sense of it all.
If you’re new to the violin then don’t expect to master this on your first attempt, or even your 20th.
Getting used to the positions and feel of holding the violin takes practice and constant correction to ensure you’re not using bad posture.
Just remember to always be concious to relax your muscles when holding and playing the violin.
This may not feel natural at first, but will come with time consistency.
And lastly, if you are experiencing any discomfort while playing or are unsure about your form it is always a good idea to seek professional help from a violin teacher as they’ll be able to give you specific direction to point out where you can improve.