You may think that your cello always looks pretty good when you come to play it, so it doesn’t need cleaning. But you’d be wrong! Just playing your cello makes it dirty, and a clean cello will work and sound better! Luckily cleaning a cello is really simple, as long as it is done regularly. Cleaning will also save money, due to less wear and tear on strings, wooden parts, and the bow.
In this post, we’ll walk you through a step by step guide of how to clean a cello to ensure your cello will always look and sound good.
What You’ll Need
Thankfully, most of the products needed for cleaning a cello are things you’ll find around the house or are very inexpensive to buy.
You’ll need:
- 2 soft microfiber cleaning cloths or dusters (One for dusting off rosin, the other is for cleaning other deposits off the fingerboard, strings and neck)
- 1 piece of soft plastic like a credit card or guitar pick
Step By Step Instructions for Cleaning a Cello
Step 1. Getting Ready
The first step to take before even attempting to clean your cello is to wash your hands.
Even if your hands are clean, your skin contains natural oils that can leave marks on the body of your cello so wash and dry them before you start the cleaning process.
(It’s also good practice to wash them every time before handling the cello too).
Step 2: Clean Rosin Off the Strings
Next you want to take one of your microfiber cloths and gently wipe the strings where the bow has been in contact with them.
You can use any cloth but microfiber (like the one below) are best.
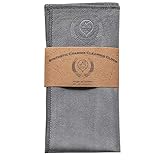
- 🎻 SOFT-TOUCH POLISHING CLOTH - MIVI Synthetic Chamois Microfiber Polishing Cloth is engineered from high-quality, lint-free synthetic chamois...
- 🎻 4 COLOR STYLES - The MIVI Synthetic Chamois Microfiber Polishing Cloth is designed by musicians with the highest quality non-scratching...
- 🎻 UNIVERSAL DESIGN- This microfiber-suede cleaning cloth is measured at 12 in. x 12 in. (300mm by 300mm). Universally designed for cleaning or...
You will see some white powder – this is the rosin residue and will come off easily if done straight away.
Step 3: Dust Rosin Off the Bridge and Top
A lot of the rosin dust falls from the strings and bow to the bridge and top of the body of the cello so you’ll need to clean it off there too.
Very gently dust the powdery rosin off the upper side of the bridge and the entire top of the cello, especially areas near the bridge.
You can use a cotton bud (Q-tips) for this part to help get in the harder to reach places.
Replace your cloth under the tailpiece ready for next time.
Step 4: Clean Rosin Off the Wood of the Bow
Next you’ll want to clean the rosin off the wooden part of the bow.
eing careful not to touch the horse hairs, as grease spots resist rosin.
Step 5: Clean the Fingerboard and Strings
Take a freshly cleaned cloth for this step.
Open it out fully, then carefully insert the flattened cloth under between the strings and fingerboard.
Slowly wipe up and down several times to clean the fingerboard.
Slide the cloth out and repeat the string cleaning again from above.
Lastly clean each string individually, partially wrapping the cloth around the string with thumb and forefinger, working slowly from the pegbox end towards the bridge.
Any slight resistance should lessen as the string becomes cleaner.
Step 6: Clean the Top, Sides and Back
Fold to a clean section of your microfiber cloth and carefully dust the whole body of the cello, removing any rosin, or dust.
Lightly rub to remove fingerprints and smudges, and polish to bring out the shine, but don’t press too hard.
You’ll also want to gently dust the scroll, pegbox, and tailpiece too at this point.
Step 7: Removing Excessive Rosin Build Up from Strings
Sometimes a hard deposit of rosin forms on strings, which is not easily dusted off.
A thin coating is normal will not affect tone – this does not need to be removed, as it will reappear after the first few strokes of the bow.
But excessive rosin build up can begin to affect tone and the response on the strings.
The rosin mostly collects on the side of the strings, rather than where the bow is in direct contact.
To remove excessive build up of rosin, use a soft piece of plastic like a credit card or guitar pic (nothing harder than a fingernail) to scrape slowly and gently at the hard rosin crust, tilting the card slightly to the left and to the right to get at the sides of the strings.
This leaves the broken up crust loose on the surface, ready to be cleaned off with your rosin cloth.
Why you Need to Clean Your Cello?
To Remove the Rosin
Rosin is a natural product made of tree sap, used to help the bow hairs grip the strings and make them vibrate.
But it is the enemy of a clean cello because it leaves a residue on the strings and powdery deposit onto the wood.
Over time, the rosin dust will harden and combine with the varnish and strings if not removed straight away, becoming difficult to remove so it’s important to clean it regularly to prevent it building up.
To Remove the Sweat, Oil and Dirt
Even clean fingers will start to leave sweat and oil deposits on the strings and fingerboard after time, so this should be removed periodically to ensure that the left hand can move freely.
Also human sweat is acidic and will gradually cause strings to deteriorate if not removed.
How Often Should you Clean a Cello?

It’s important to remove rosin deposits after every time you play.
This is to avoid troublesome rosin build up that if left can be really hard to get rid of – Steps 1-4.
Then, give the cello a full clean probably every 2-3 months.
That being said, if you’re playing very frequently or live in a hot climate than you probably will want to clean it more often – Steps 5-7.
What To Avoid
Never use any kind of furniture polish, household cleaner or antibacterial spray to clean the wooden parts of the cello as these could remove the varnish.
Avoid using any commercial household cleaners, polishes or alcohol on the strings or fingerboard.
Alcohol may get onto the varnish and strip it off, and it will penetrate to the inner core of the strings, taking thinned rosin deposits and dirt inside.
Avoid steel wool, cork or abrasive cleaners to scrape rosin off the strings, as they may damage the string surface or fuse the rosin to the string through friction.
A variety of string cleaners, instrument wood polishes and string oils are available but these are not recommended.
Instrument makers have unique varnish recipes and there is always the risk that a polish or cleaner is not suited to your cello or strings and could cause damage.
If you have a particular cleaning problem, seek specialist advice from a luthier or your cello manufacturer.
Remember that most scratches are purely cosmetic and do not affect sound quality.
Sanitising the Cello
During the covid 19 pandemic you may wish to sanitise and disinfect a cello, particularly if it is played by more than one person.
Unfortunately there is no safe easy way to do this without risking damage to the cello.
Alcohol is needed to kill the virus, but this is damaging to varnish if it gets onto wooden areas.
If you cannot avoid sharing instruments, leave them for a sufficient time period, in accordance with expert guidance, so that the virus cannot survive on the cello surfaces.
Other Cello Maintenance Tips

Where to Store Your Cello
Cellos are made of wood, metal, string and glue, so they are susceptible to changes in temperature and humidity.
A level temperature and humidity are best, and so do not store cellos next to heat sources, air conditioners or hot/cold drafts.
Padded cello cases also help to insulate them from changes in temperature and humidity.
Cello Cases
The padding in most soft cases gives some protection against knocks and temperature changes but the cello is still vulnerable – especially the bridge, and will not withstand falls or knocks so choose a storage place away from busy areas.
Hard cases give much more robust protection against accidental knocks or movements, and further insulate cellos from changes in temperature and humidity.
Temperature
Generally storing your cello where in a comfortable living environment for people, will keep them at the correct temperature and guard against extremes.
Also, sudden temperature changes will cause tuning problems, so don’t leave them outdoors and allow them to adjust gradually.
Humidity
Humidity potentially has a worse effect than temperature change, as a very humid environment can cause the cello to swell, lower the fingerboard, lengthen bow hairs and even warp or unstick the glue.
To help prevent this you should avoid
A very dry climate can cause cracking, or broken strings so very dry and damp places should be avoided.
Humidity monitors are available if needed and you can also get cello humidifiers to help prevent this like the one below.
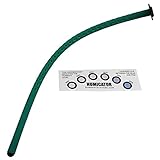
- Designed to slowly release moisture and maintain humidity to help prevent cracking and warping of your instrument
- Protect your instrument from damage caused by dry, warm air
- Insert into the sound hole of your instrument
Tips for Easy Cello Care
- Before you play, always wash your hands thoroughly to prevent dirt getting onto the cello.
- Keep your rosin cloth with the cello for daily use, folding and gently tucking it under the tailpiece after dusting.
- After playing, put the cello and bow carefully back into the case, to keep them dust and dirt free.
- Be gentle when cleaning – avoid hard, rough or vigorous movements. Not only does this risk damage to the fragile wooden body of the cello, but friction on strings causes heat which can melt and fuse the rosin to the strings.
- Use rosin sparingly – you only need to pass the bow from the heel to point and back again over the rosin, with a few small extra rubbing motions near the heel and point. If you didn’t play for long, don’t reapply until needed, to minimise build up on the cello and bow.
- Don’t over-tighten your bow when you play. At correct tension, the round part of a pencil will just fit between the wood and hair in the middle of the bow. Tightening more than this could stretch the hairs, leading to rehairing sooner than necessary, and at worst risk snapping the bow.
- Always loosen the bow before packing away, by turning the silver screw at the heel. With the heel towards you, turn it anticlockwise (to the left or ‘lefty-loosey!’). You should see individual hairs but don’t make them too floppy, as they could catch on parts of the case and break when packing away.
Conclusion
That’s it for our guide to cleaning your cello, we hope it helps to explain what to do.
Your cello will thank you in four different ways for following the simple cleaning routine and maintenance tips outlined above.
It will look more attractive, require less maintenance, feel easier to play and sound more beautiful!